 Pin
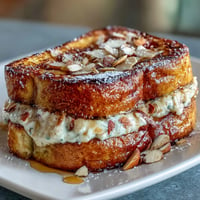
Pin My aunt's kitchen in Cairo always smelled like toasted nuts and butter when she made konafa for family gatherings. I watched her weathered hands separate those impossibly thin kataifi strands with such patience, never rushing, as if the dessert itself demanded respect. One afternoon, she let me try layering the pastry, and I pressed too hard the first time, crushing the delicate strands until she gently showed me how to let the weight of butter do the work instead. That moment taught me konafa isn't about force—it's about understanding the pastry's fragile nature and coaxing it into crispy, golden submission.
I made this for my best friend's birthday last spring, and watching her close her eyes after the first bite told me everything. She asked for the recipe that same night, and now whenever she makes it, she texts me photos of her golden-brown pastry. There's something special about sharing a recipe that becomes someone else's tradition too.
Ingredients
- Kataifi (shredded phyllo dough): This is the soul of the dessert—those fine, hair-like strands create the signature crispy texture that makes konafa different from any other pastry. Thaw it completely, but handle it gently because it dries out quickly once exposed to air.
- Unsalted butter: Use good quality butter because there's nowhere for it to hide in a simple recipe like this. The butter toasts alongside the pastry, creating those golden, almost nutty layers.
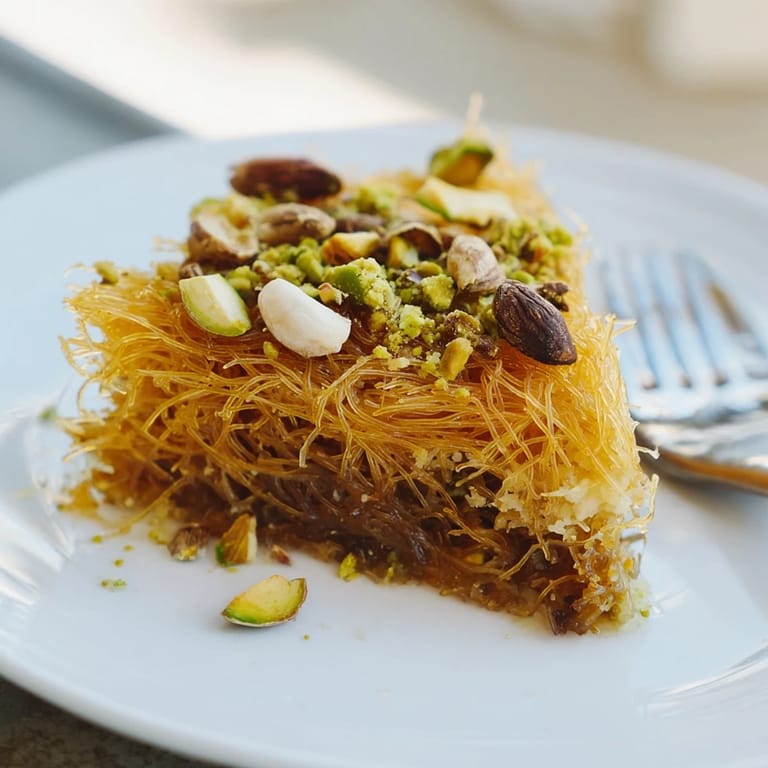
- Walnuts, pistachios, and almonds: Chop them finely and evenly so they distribute throughout the filling without clumping. The mix of three nuts creates depth—each one brings a different richness to the final bite.
- Cinnamon and cardamom: These spices are what transform kataifi from good to unforgettable. Don't skip the cardamom; it's the secret whisper underneath everything.
- Honey syrup: The syrup needs to be warm enough to be absorbed by the hot pastry but cooled slightly so it doesn't turn the layers soggy immediately. Lemon juice balances the sweetness beautifully, while rose or orange blossom water adds that authentic Middle Eastern touch.
Tired of Takeout? 🥡
Get 10 meals you can make faster than delivery arrives. Seriously.
One email. No spam. Unsubscribe anytime.
Instructions
- Prepare your space and pastry:
- Preheat your oven to 180°C and butter your 23 cm pan generously. Take your thawed kataifi and gently separate the strands with your fingers—imagine you're untangling hair, not ripping apart dough. Divide it into two equal portions so you have enough for top and bottom layers.
- Build the foundation:
- Press half your kataifi into the pan, using your fingertips to create an even base layer. It should be packed enough to hold together but not so tight that it can't crisp up during baking. Drizzle half the melted butter over this layer, using a pastry brush to ensure even coverage.
- Create the nut layer:
- Mix your chopped nuts with sugar, cinnamon, and cardamom in a bowl. Spread this mixture evenly over the buttered kataifi—don't pile it in the center or leave bare spots on the edges. This is where the flavor lives, so take a moment to distribute it thoughtfully.
- Seal and finish:
- Top with your remaining kataifi, pressing gently to seal in the nuts without compressing everything into a dense brick. Brush generously with the rest of the melted butter, making sure every strand gets a kiss of golden richness. This is crucial for that crispy, shattered texture.
- Bake until golden:
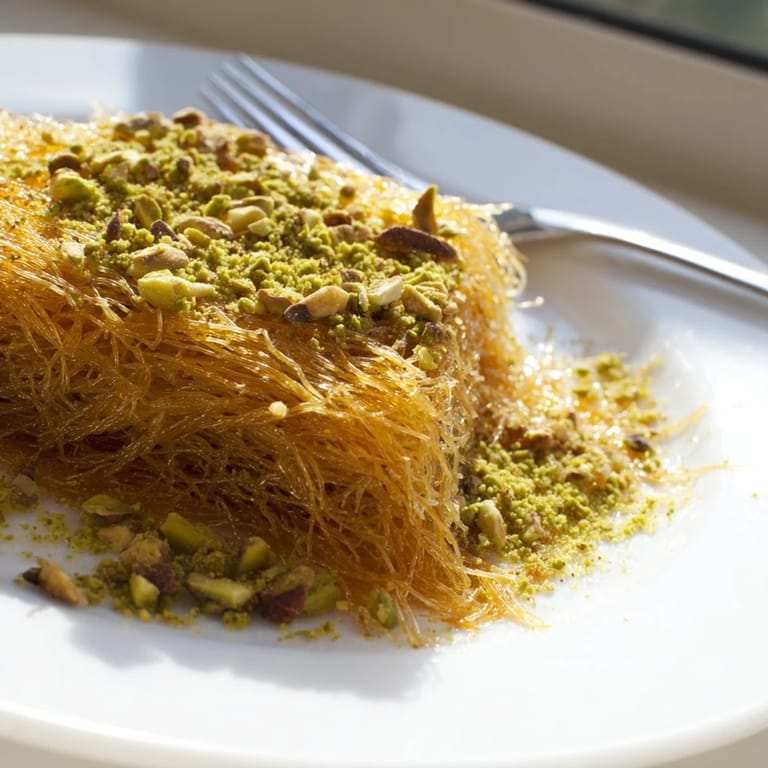
- Bake for 30–35 minutes until the top is deep golden brown and you can hear it crackling slightly if you listen closely. The konafa should look like golden straw when it comes out of the oven.
- Make the honey syrup:
- While the pastry bakes, combine sugar and water in a saucepan and bring to a boil, then simmer for 7–8 minutes until slightly thickened. Remove from heat and stir in honey, lemon juice, and floral water if using—let it cool for just a few minutes so it's still warm but not scorching.
- The crucial pour:
- The moment the konafa emerges golden from the oven, immediately pour the warm syrup evenly over the entire surface. This is the magic moment—the hot pastry absorbs the syrup while the layers are still crisp, creating that perfect texture contrast.
- Rest and slice:
- Let it cool for about 30 minutes until it's warm but handleable. Use a sharp knife to cut clean diamonds or squares, wiping the blade between cuts to keep them neat.
 Pin
Pin My sister served this at her daughter's engagement party, and three different relatives asked for the recipe before they'd even finished their first piece. I realized then that konafa carries weight beyond dessert—it's an edible promise that you took time to create something that matters.
Understanding the Syrup
The syrup is what separates good konafa from the kind you dream about days later. Many people make it too thick or too thin, but the right consistency soaks in without making the pastry soggy. When you watch it simmer, you're not just cooking sugar and water—you're creating the glue that holds the entire experience together. The lemon juice isn't just decoration; it cuts through the sweetness in a way that makes your palate refresh between bites, and if you use rose water, it whispers rather than shouts.
Playing with Nuts and Flavors
While the traditional combination of walnuts, pistachios, and almonds is stunning, I've experimented with hazelnuts and pecans, and they're equally delicious. The key is maintaining that fine chop so the filling stays distributed and doesn't slide around inside the pastry layers. Some people add a pinch of nutmeg or a touch of clove, which deepens the spice profile beautifully. My advice is to taste your nut mixture before layering—if you can taste the spices clearly against the butter and nuts, you've got the balance right.
Serving and Storage
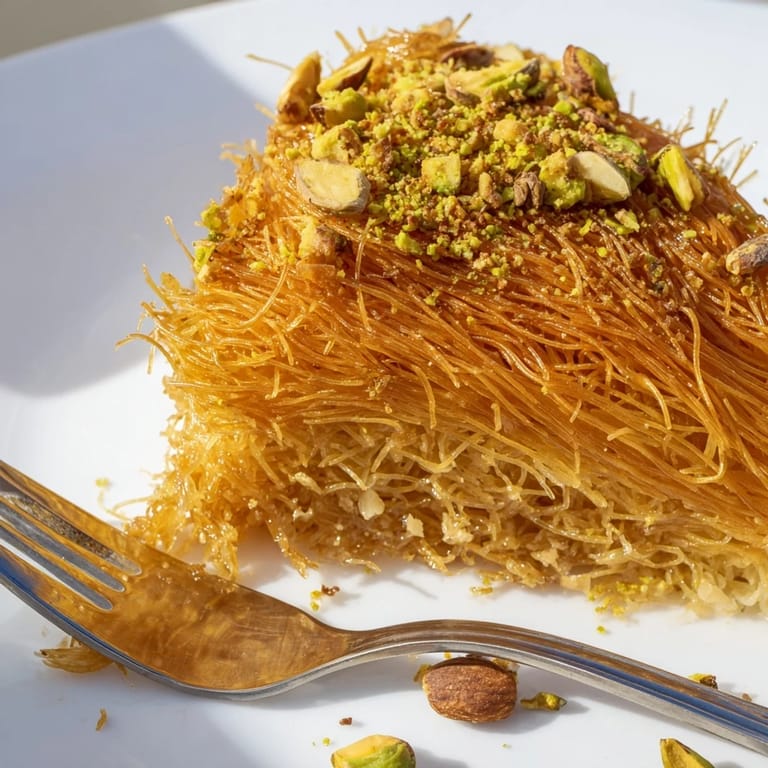
Konafa is best served at room temperature, which might seem strange for a fresh-baked pastry, but it's when the textures truly shine. The warmth of fresh baking fades beautifully into a more refined crispness as it cools.
- Serve it with whipped cream or a dollop of clotted cream for richness that complements the honey and spices.
- Fresh berries alongside add brightness and cut through the sweetness in a way that feels almost elegant.
- Stored covered at room temperature, it stays crisp for up to two days, though it's honestly best within a few hours of baking.
 Pin
Pin Making konafa is an act of gentle intention, and when you nail it, you understand why it's been made the same way across the Middle East for generations. It's dessert, yes, but it's also permission to slow down and do something right.
Recipe Q&A
- → What type of pastry is used for Egyptian Konafa?
Kataifi, shredded phyllo dough, is used for its crisp texture and ability to hold fillings well.
- → Which nuts are traditionally included in the filling?
A mix of walnuts, pistachios, and almonds enhances the nutty flavor and adds crunch.
- → How is the honey syrup prepared?
Simmer sugar and water until slightly thickened, then stir in honey, lemon juice, and optionally floral water for aroma.
- → Can the nut filling be substituted?
Yes, hazelnuts, cashews, or pecans can replace the traditional nuts while maintaining richness.
- → What baking tips help achieve a crisp kataifi layer?
Press kataifi firmly in the pan, drizzle evenly with melted butter, and bake until golden brown for optimal crispness.
- → How should the dish be served?
Cool for 30 minutes after soaking with syrup, then slice into portions. It pairs nicely with fresh berries or whipped cream.