 Pin
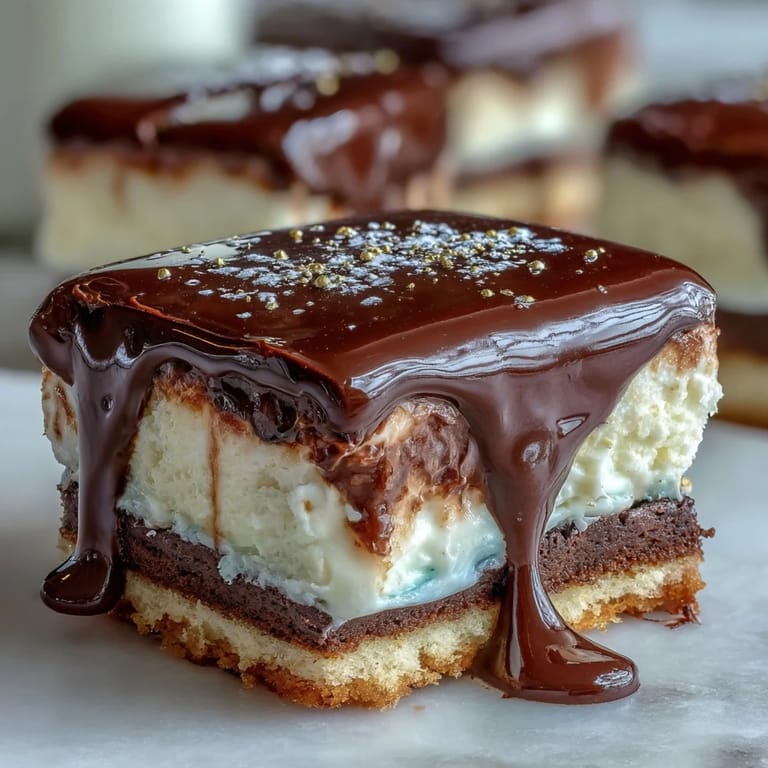
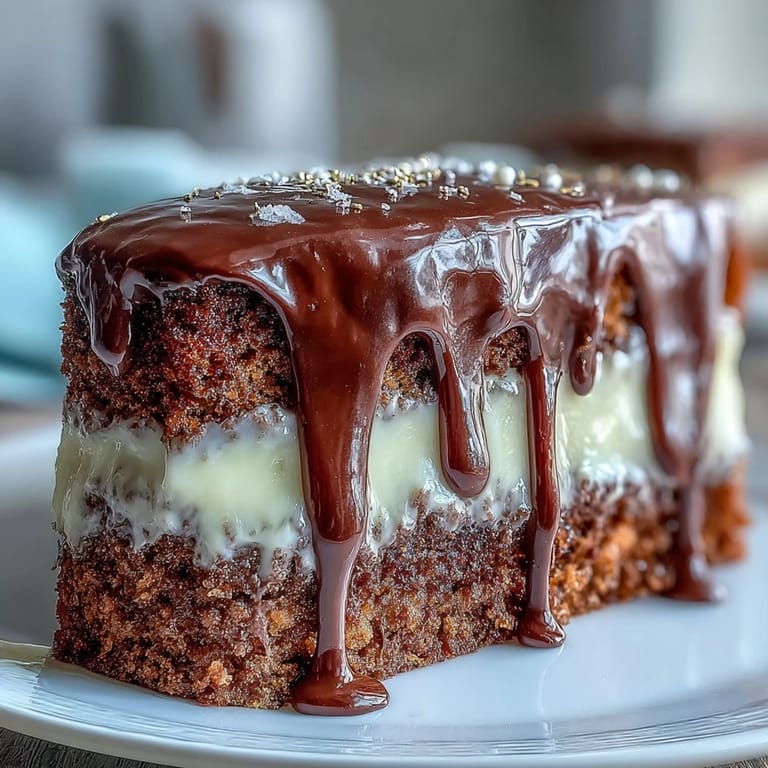
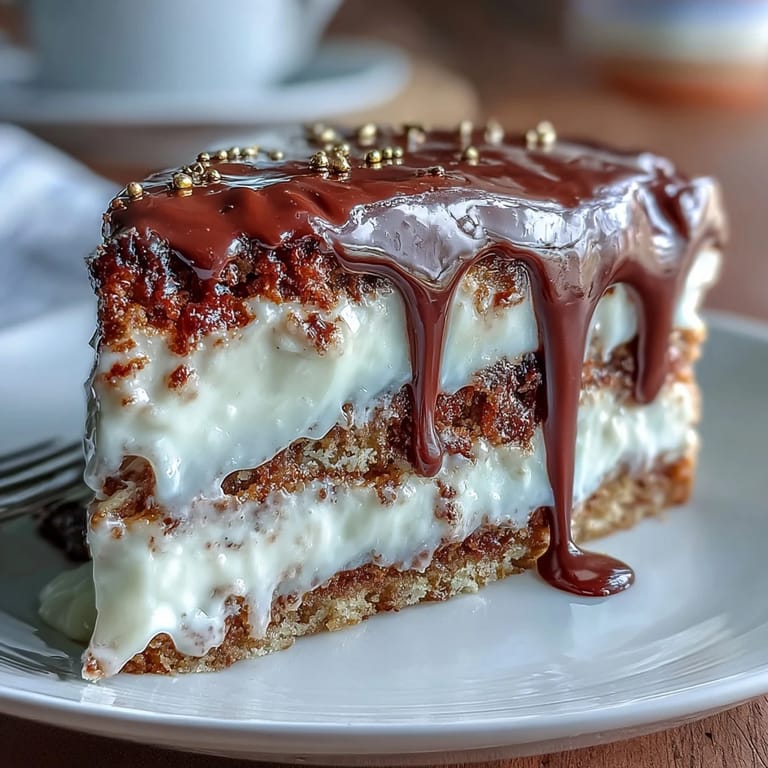
Pin My friend texted me a photo of her graduation cap mid-throw, and I knew exactly what I needed to make—something that looked as celebratory as that moment felt. This white chocolate drip cake arrived in my kitchen almost by accident, born from wanting to capture that specific blend of elegance and pure joy that milestones deserve. The vanilla sponge is impossibly tender, the buttercream tastes like clouds, and those gold balloon toppers? They're the kind of detail that makes people gasp when they see it. Every layer serves a purpose, from the crumb coat that keeps everything pristine to the glossy ganache cascade that catches the light just right.
I made this cake for my neighbor's daughter, and watching her face when she saw the gold balloons cascading down the side of the cake reminded me why I bake. Her mom told me later that she couldn't bring herself to cut into it for almost an hour—she just kept taking photos and showing everyone who walked by. That's when I realized this cake isn't just dessert; it's a physical way of saying, 'This moment matters.'
Ingredients
- All-purpose flour (2 ½ cups): This is your foundation, and sifting it with the baking powder keeps lumps from hiding in your batter and creating dense pockets in the finished cake.
- Baking powder (2 ½ tsp): Double-check the expiration date—stale baking powder is why cakes sometimes refuse to rise, and it's a frustration I wouldn't wish on anyone.
- Unsalted butter (2 cups total): Room temperature butter creams properly and incorporates air, which is the whole secret to a tender crumb and light texture.
- Granulated sugar (2 cups): Beat this with the butter longer than feels necessary—that pale, fluffy stage is when you're actually building structure into your cake.
- Large eggs (4): Room temperature eggs blend smoothly into the batter without shocking the mixture, which keeps the emulsion stable and your cake tender.
- Pure vanilla extract (2 tsp total): The real deal matters here because imitation extract tastes metallic against white chocolate buttercream, and you'll taste the difference.
- Whole milk (1 cup): Room temperature milk tempers the batter and keeps it from curdling when it meets the warm creamed butter and sugar.
- White chocolate (6 oz for buttercream, 6 oz for drip): Chop it finely so it melts evenly, and always cool it to room temperature before stirring it into buttercream to avoid separation.
- Heavy cream (4-5 tbsp total): For the ganache, use it warm; for the buttercream, it adjusts consistency when temperatures shift unexpectedly.
- Powdered sugar (4 cups): Sift this even if it looks fine in the bag—lumps are stubborn and will show up in streaks across your finished frosting.
- White chocolate crispy pearls or malt balls: These become your gold balloons, and their hollow centers make them lightweight enough to stay upright when anchored with toothpicks.
- Edible gold spray or luster powder: A light hand is key—more gold doesn't mean more celebratory, and it can look overwhelming if you get heavy-handed.
Tired of Takeout? 🥡
Get 10 meals you can make faster than delivery arrives. Seriously.
One email. No spam. Unsubscribe anytime.
Instructions
- Set Your Oven and Prep Your Pans:
- Preheat to 350°F and grease three 8-inch round pans with a light hand, then line them with parchment so the cakes come out cleanly. Having everything ready before you start mixing means you won't be rushing your batter into the oven in a panic.
- Combine the Dry Ingredients:
- Whisk flour, baking powder, and salt together in a medium bowl, making sure there are no hidden pockets of baking powder hiding in the corners. This step prevents lumps and ensures even rise.
- Cream Butter and Sugar Until Pale:
- Beat them together for at least 3 minutes until the mixture looks almost white and feels light and fluffy to the touch. This is where air enters your cake, and it's impossible to rush.
- Add Eggs and Vanilla:
- Beat in one egg at a time, letting each one fully incorporate before adding the next, then pour in vanilla. Listen for the mixer to stop sputtering slightly—that's your signal everything is mixed.
- Alternate Wet and Dry Ingredients:
- On low speed, add a third of the flour mixture, then half the milk, then another third of flour, then the remaining milk, then the last of the flour, mixing just until combined after each addition. Overmixing at this stage develops gluten, which makes the cake tough instead of tender.
- Divide and Bake:
- Pour batter evenly into the three pans, smooth the tops gently, and bake for 30 to 35 minutes until a toothpick comes out clean. Oven doors have windows for a reason—peek, but don't open.
- Cool and Level:
- Let cakes rest in their pans for 10 minutes, then turn them out onto wire racks to cool completely. Once cool, use a serrated knife or cake leveler to shave the domes off the tops so your layers stack flat and stable.
- Make the White Chocolate Buttercream:
- Beat softened butter until smooth, gradually add sifted powdered sugar while mixing, then pour in melted and cooled white chocolate along with vanilla, salt, and 2 tablespoons cream. Beat until fluffy and light, adding more cream by the tablespoon if the frosting feels too stiff.
- Layer and Crumb Coat:
- Place the first cake layer on your serving plate, spread a thin coat of buttercream on top, add the second layer, spread more buttercream, then add the third layer. Cover the entire cake with a very thin crumb coat and chill for 30 minutes so the final coat of frosting sticks without pulling up crumbs.
- Apply the Final Frosting:
- Spread a thick, generous coat of buttercream over the chilled cake, using an offset spatula to smooth the sides and create an even top. Take your time here because this is your canvas for the drip.
- Make the White Chocolate Ganache Drip:
- Heat heavy cream until it just simmers, pour it over finely chopped white chocolate, wait 1 minute, then stir until completely smooth and glossy. Let it cool to room temperature before using—too warm and it runs everywhere, too cool and it won't drip.
- Create the Dramatic Drip:
- Using a spoon or squeeze bottle, drizzle the ganache around the top edge of the cake in a loose, organic pattern, letting it cascade down the sides wherever it wants to go. Fill the center flat top with more ganache and smooth it with an offset spatula, creating a clean finish that contrasts with the wild drips.
- Make and Assemble Gold Balloons:
- Spray crispy pearls or malt balls with edible gold spray (or roll them in gold luster powder), let them dry completely, then insert toothpicks or thin cake wires through the centers. Arrange them on top in a cheerful cluster that looks effortless but actually took a few minutes to balance just right.
- Chill and Serve:
- Refrigerate the finished cake until you're ready to serve, then bring it to room temperature for 30 minutes before slicing so the buttercream is silky and soft. The flavors are brightest and the texture is most tender when the cake isn't cold straight from the fridge.
 Pin
Pin There's a quiet moment right before you hand a cake like this to someone—when you've finished all the technical work and you step back to look at it—where you realize that somewhere between measuring flour and arranging gold balloons, you've made something that holds celebration inside it. That's what this cake does.
The Secret to Three Perfect Cake Layers
The difference between a cake that looks professional and one that looks homemade often comes down to whether the layers are level and evenly sized. After the cakes cooled, I started using a serrated knife to gently shave the domes off the tops, turning what would have been uneven stacks into perfectly flat, stackable rounds. This one small step—which takes maybe two minutes per layer—transforms how the whole cake looks and tastes because everything sits flush instead of tilting toward one side.
Why White Chocolate Changes Everything
White chocolate feels intimidating because it's temperamental, but it's also forgiving in ways dark or milk chocolate never are. Its delicate flavor plays beautifully with vanilla without competing or becoming cloying, and because it's naturally pale, the buttercream frosting looks pristine and clean without needing food coloring. The moment I realized that white chocolate ganache could create a dramatic drip while tasting like pure luxury instead of bitter cocoa intensity, I stopped making celebration cakes any other way.
Timing and Make-Ahead Strategy
This cake rewards planning because each component can be made on its own timeline without rushing. The sponge layers can be baked the day before and wrapped in plastic wrap overnight, the buttercream keeps in the refrigerator for three days before assembly, and the ganache can be made hours ahead and gently warmed to pourable consistency when you're ready to drip. Build in this flexibility and you move from stressed to actually enjoying the final decorating stages, which is when the cake stops being a task and becomes a celebration.
- Bake the cake layers the day before if your schedule is tight, and they'll actually have slightly better texture after sitting overnight.
- Make the buttercream up to three days ahead and store it covered in the refrigerator, then bring it to room temperature and re-beat for 2 minutes before using.
- Assemble the cake no more than 8 hours before serving so the frosting stays fresh and the drip doesn't start to crack or separate.
 Pin
Pin Graduation cakes exist in that beautiful space where technique and emotion collide, and this one captures that feeling exactly. Make this cake knowing that you're building something meant to be remembered alongside the person you're celebrating.
Recipe Q&A
- → How do I achieve a smooth white chocolate drip?
Heat cream until just simmering and pour over finely chopped white chocolate. Let it sit briefly before stirring gently to a smooth ganache consistency ideal for dripping.
- → What’s the best way to keep the vanilla sponge moist?
Beating butter and sugar until fluffy and alternating dry ingredients with room temperature milk ensures a tender, moist crumb in the sponge layers.
- → Can I prepare the buttercream in advance?
Yes, the white chocolate buttercream can be made ahead and refrigerated. Bring to room temperature before spreading for smooth application.
- → How are the gold balloons created?
White chocolate crispy pearls or malt balls are sprayed or dusted with edible gold and then arranged on toothpicks or wires to form balloon-like decorations.
- → How should this cake be stored?
Keep refrigerated up to 3 days and bring to room temperature before serving to preserve texture and flavor.