 Pin
Pin I'll never forget the December evening when my sister challenged me to create something different for our annual holiday gathering. She wanted a cheese board, yes, but something that felt less like tradition and more like magic. That's when I spotted a pattern in how I'd been slicing a block of Gouda—triangular, pointed, almost tree-like—and suddenly I could picture it: an entire border of edible pine trees framing our festive spread. It took me just fifteen minutes to transform simple cheese and grapes into something that made everyone stop and smile before they even tasted it.
I made this for the first time at a potluck where everyone brought store-bought platters. When I unveiled my cheese board with its geometric forest of triangular slices, the room went quiet for a moment. Then someone laughed—not at it, but with pure delight—and said, 'This is almost too pretty to eat.' Almost. Within minutes, those trees were being plucked away, one by one, and I watched as the border disappeared before the center of the board.
Ingredients
- Semi-firm cheese (Gouda, Edam, or Emmental), 250 g, well chilled: You want something that holds its shape when sliced but isn't so hard it crumbles. The chill is crucial—warm cheese will slip and bend on you. I learned this the messy way. Gouda has this beautiful golden tone that reads as 'festive' immediately.
- Small green seedless grapes, 150 g, washed and thoroughly dried: The 'pine needles' that complete the illusion. Moisture is the enemy here; wet grapes will slide right off your board. I pat mine dry with paper towels and let them sit for a few minutes to shed any remaining water.
Tired of Takeout? 🥡
Get 10 meals you can make faster than delivery arrives. Seriously.
One email. No spam. Unsubscribe anytime.
Instructions
- Chill your cheese and sharpen your knife:
- Take your cheese block straight from the coldest part of your fridge. A truly sharp knife is everything—it glides through cold cheese without crushing it. I use a chef's knife and wipe it clean between cuts so each slice stays crisp and true.
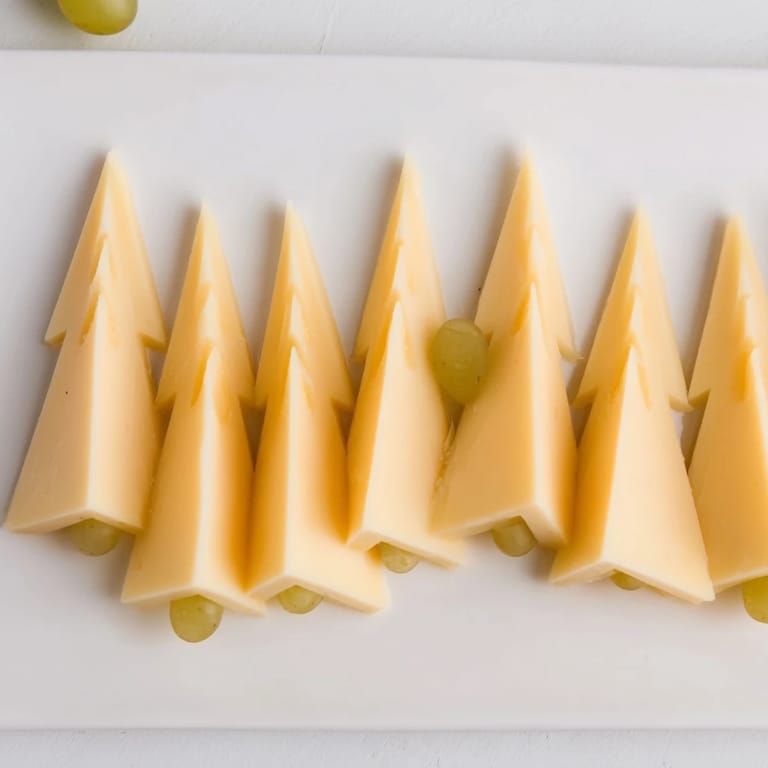
- Slice into tree shapes:
- Cut the cheese into thin triangles, each about 5–6 cm long with a 1 cm base. Think of them as tiny pine tree silhouettes. The point matters—it's what catches the light and makes the magic happen. This takes longer to describe than to do, I promise.
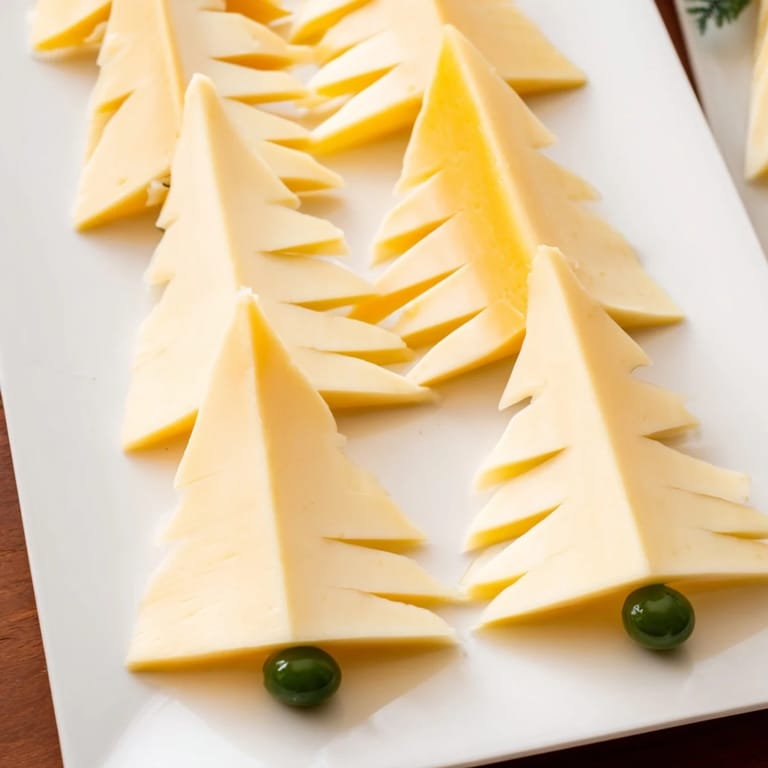
- Arrange the border:
- Start at one corner of your board and place triangles point-outward along all four edges. I angle them slightly so they fan out like real branches. Leave small gaps—not too tight, not too loose. This is where the grapes come in.
- Nestle in the grapes:
- Tuck green grapes into the spaces between cheese triangles. They should look like they're nestled among the branches, creating depth and that genuine forest-floor feel. Turn some on their sides if they sit too high.
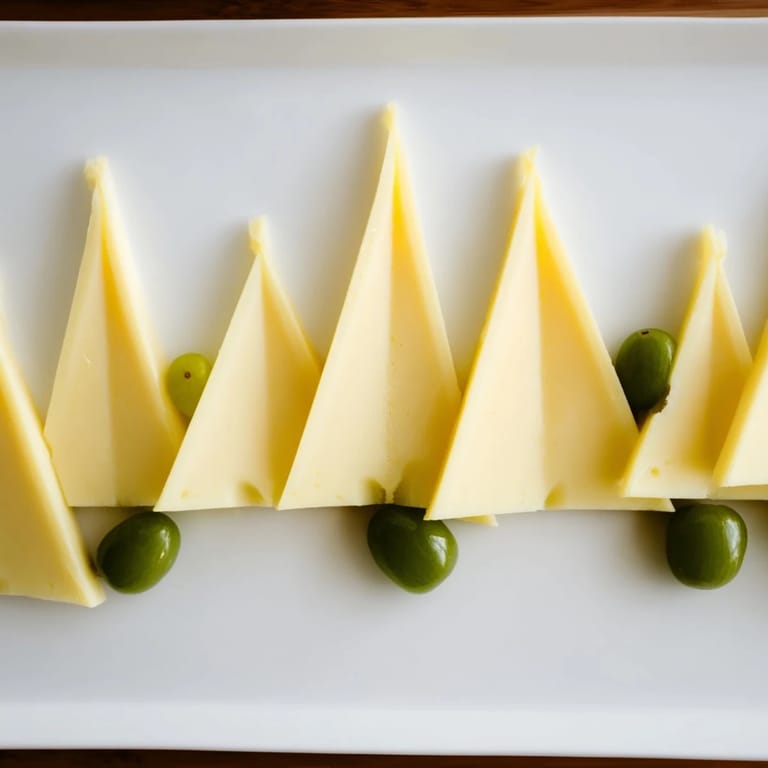
- Complete the circle:
- Continue until the entire border is a continuous, festive frame. Step back and look—does it feel like a little edible forest? If not, adjust. It's that simple.
- Fill the center:
- Now the board is yours. Add your favorite cheeses, cured meats, crackers, nuts, dried fruit. This frame is just the opener; what comes next is entirely your choice.
 Pin
Pin That potluck taught me something unexpected: presentation isn't superficial. It's generosity. When you take time to arrange food beautifully, you're saying, 'You matter enough for me to care about how this looks.' The Tannenbaum Border does that in fifteen minutes.
Why Cheese Slicing Is an Underrated Skill
I used to think any knife work was just knife work. But there's something meditative about the steady, deliberate motion of slicing cheese into uniform pieces. The consistency matters not just for looks but for how it feels to eat—each piece should be the same thickness so the flavors register equally. A dull knife creates ragged edges that catch light differently and feel crumbly on the tongue. A sharp knife creates clean surfaces that glisten. Your hands will thank you, and so will your guests.
The Art of the Cheese Board Edge
I've learned that the border of a cheese board is like the frame of a painting. It doesn't just contain the composition; it sets the tone for everything inside. A plain edge says, 'Here is food.' A thoughtfully designed edge says, 'Here is an experience.' This tree-shaped border transforms an ordinary platter into something that feels intentional, festive, and finished. It's the detail that makes people remember the meal.
Variations and Personal Touches
While the green grape-and-cheese combination is classic and perfect, I've discovered this design is incredibly flexible. Red grapes create a slightly warmer, more autumnal feel. Pomegranate seeds add a jewel-like quality and a tart pop. One year, I added thin slices of fresh rosemary between the cheese triangles, and it genuinely looked like pine needles—the scent alone transported everyone straight into holiday mode. The beauty is that you can adjust it to match your mood, your board's contents, or the season.
- Try alternating red and green grapes for a more varied visual rhythm
- A few pomegranate seeds scattered among the triangles add sophisticated color contrast
- Fresh rosemary sprigs between the cheese intensify the forest feeling and add aroma
 Pin
Pin Every time I make this, I'm struck by how a little thoughtfulness transforms something ordinary into something memorable. Fifteen minutes of focused attention creates a moment that lasts all evening.
Recipe Q&A
- → What cheeses work best for the Tannenbaum border?
Semi-firm cheeses like Gouda, Edam, or Emmental are ideal for slicing thin triangular shapes that hold their form well around the board.
- → How should the cheese be sliced for this design?
Cut the cheese into thin triangles about 5–6 cm long and 1 cm wide at the base to resemble stylized pine trees with pointed tips.
- → Can other fruits be used instead of green grapes?
Green grapes provide color contrast and shape, but small red grapes or pomegranate seeds can be alternated for added visual interest.
- → How do I arrange the pieces to create the pine tree effect?
Place cheese triangles along all four edges of the board with points facing outward, and nestle grapes between the slices to mimic tree foliage.
- → Are there any tips to enhance the aroma or appearance?
Incorporate fresh rosemary sprigs among the cheese and grapes for a pine needle aroma and extra greenery to enhance the holiday theme.
- → Is this border suitable for gluten-free diets?
Yes, the main components—cheese and grapes—are gluten-free, making this design suitable for guests with gluten sensitivities.