 Pin
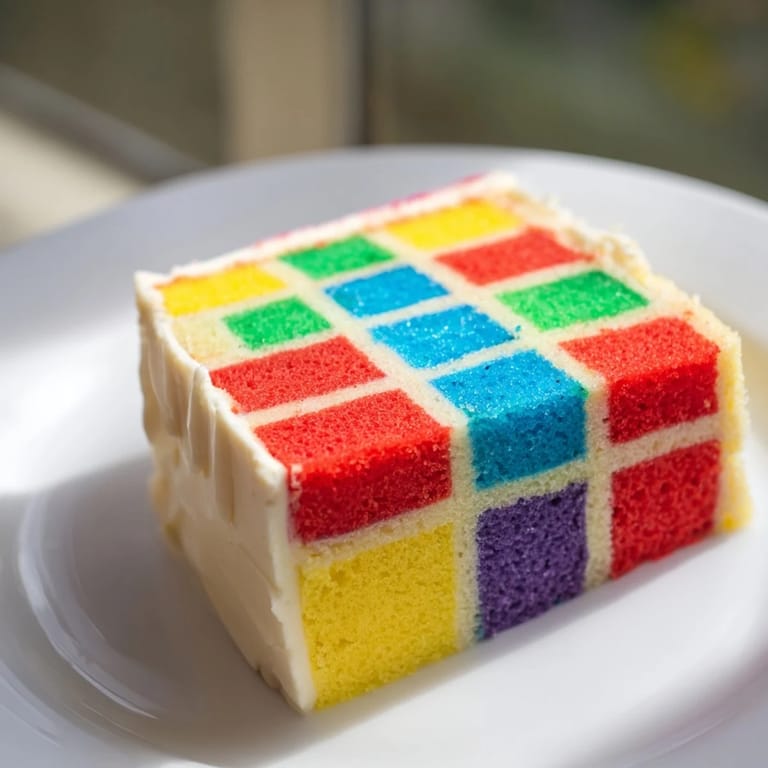
Pin I'll never forget the afternoon my grandmother pulled out a faded photograph of her mother's quilt—a patchwork masterpiece of jewel-toned squares stitched together with such care. That same day, while we were having tea, she mentioned wishing she could capture that same feeling in a cake. Years later, when I finally created this Cozy Quilt Patchwork Cake, it felt like I'd unlocked a memory I never lived but somehow always knew. Each colored square is a stitch, each layer a row, and when you cut into it, you discover the beautiful geometry of something made with intention and love.
I made this cake for my daughter's ninth birthday, and the moment she saw that kaleidoscope of colors inside, her whole face lit up. She insisted on helping arrange the squares, carefully placing each one like she was assembling her own edible quilt. We laughed at the slightly wobbly corners, and she said, 'Real quilts aren't perfect either, Mom—that's what makes them special.' She was right.
Ingredients
- All-purpose flour (350 g): The foundation of your tender crumb—make sure it's fresh and properly measured by spooning and leveling, not scooping directly from the bag, which packs too much flour in
- Granulated sugar (300 g): Works with the butter to create that light, fluffy texture that makes this cake feel like a cloud
- Baking powder (2½ tsp): Your leavening agent—this amount is crucial for the right rise without a bitter aftertaste
- Salt (½ tsp): A pinch that enhances sweetness and balances all the flavors beautifully
- Unsalted butter, softened (250 g for cake, 350 g for frosting): Room temperature butter creams properly and creates the tender crumb you want; cold butter won't incorporate air
- Large eggs (4): At room temperature, they emulsify better with the butter and create structure
- Whole milk (250 ml): The dairy creates richness and helps keep the cake moist for days
- Vanilla extract (2 tsp plus 2 tsp for frosting): Use real vanilla if you can—the difference is subtle but soul-deep
- Food coloring gels (red, yellow, green, blue, purple): Gel colors are vibrant without weakening the batter like liquid colors do; this is non-negotiable for the visual magic
- Powdered sugar (500 g): Sifted before measuring prevents lumps in your frosting
Tired of Takeout? 🥡
Get 10 meals you can make faster than delivery arrives. Seriously.
One email. No spam. Unsubscribe anytime.
Instructions
- Prepare your workspace:
- Preheat your oven to 180°C (350°F) and take a moment to grease and line five 20 x 20 cm square baking pans with parchment paper. If you don't have five pans, don't stress—you can bake in batches, just keep track of which color you're baking and let the pans cool between batches. Line them so the parchment comes up the sides, making removal easier later.
- Cream the base:
- In a large bowl, beat the softened butter and sugar together until the mixture looks pale and fluffy, about 3-4 minutes. You'll know it's ready when it looks almost like frosting itself. This step is where air gets incorporated, and it matters more than you'd think. Then beat in the eggs one at a time, waiting for each to fully combine before adding the next. Add the vanilla and listen for the mixer to run smoothly—everything should be well-incorporated.
- Make the dry blend:
- In another bowl, whisk together the flour, baking powder, and salt. This prevents lumps and distributes the leavening evenly. Set aside.
- Alternate wet and dry:
- Add the flour mixture and milk to the creamed butter in alternating additions, starting with flour and ending with flour. Do this gently—overmixing creates toughness. You should see the batter come together smoothly, with a texture like thick sour cream.
- Divide and color:
- Divide the batter evenly into five bowls. Working one at a time, add a few drops of gel food coloring to each bowl, stirring gently until the color is even. Start with less color than you think you need—you can always add more. The colors should be jewel-toned and vivid, like the squares in a real quilt.
- Bake the layers:
- Pour each colored batter into its prepared pan and spread evenly with a spatula. Bake for 20-25 minutes, until a toothpick inserted in the center comes out clean or with just a few moist crumbs. The cakes should spring back when you touch the center lightly. Let them cool in the pans for 10 minutes—this prevents them from breaking apart—then turn out onto wire racks to cool completely. This usually takes about 30-40 minutes.
- Prepare the buttercream:
- While the cakes cool, beat the softened butter until it's creamy and pale, about 2-3 minutes. Gradually add the sifted powdered sugar, a handful at a time, beating constantly. Add the vanilla and a pinch of salt. Once the mixture looks fluffy and thick, add milk a tablespoon at a time until you reach a spreadable consistency—thick enough to hold its shape but soft enough to work with.
- Trim and square:
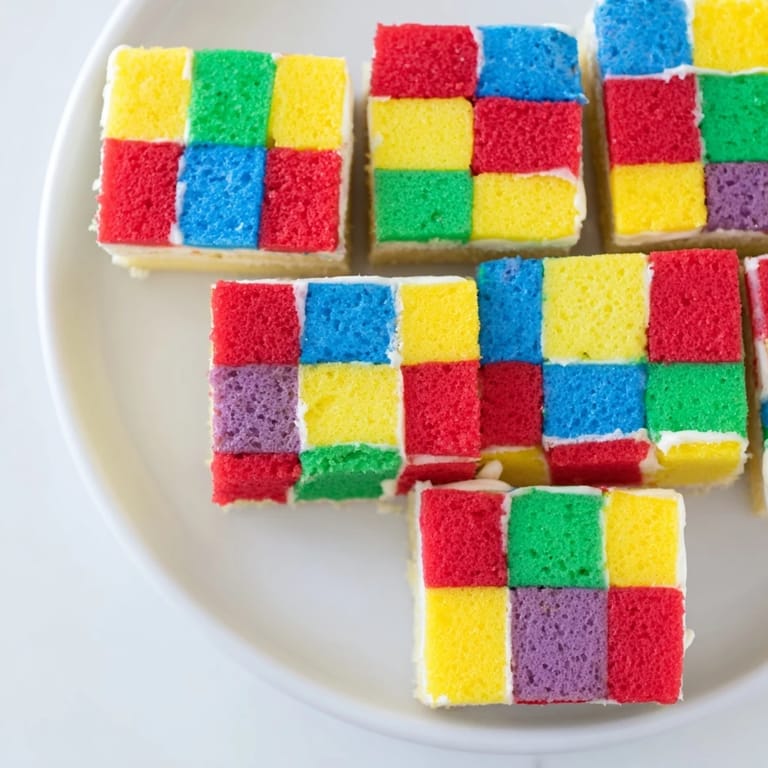
- Once the cakes are completely cool, carefully trim the edges to make them even. Then, using a sharp serrated knife, slice each colored sponge into uniform 3 x 3 cm squares. You'll need to be patient and precise here—measure with a ruler if you must. The uniformity is what makes the patchwork magic work.
- Arrange the patchwork:
- On a large, sturdy tray, begin arranging your squares in alternating colors, like a real quilt. Spread a thin layer of buttercream between squares to act as glue, building layers as you go. Keep alternating colors so the pattern is visible when you cut into it. This is meditative work—take your time and enjoy the geometry of it.
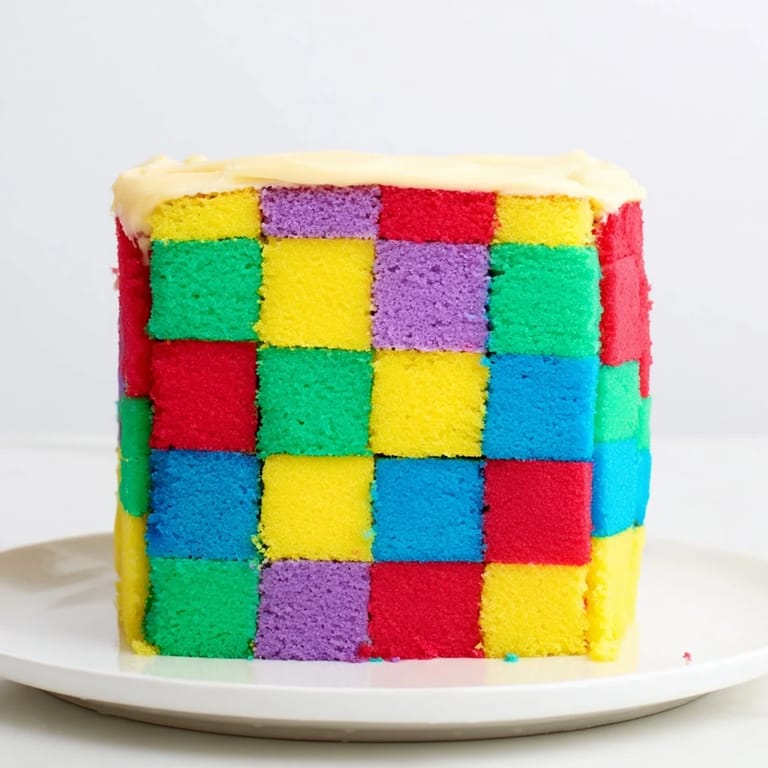
- Frost and finish:
- Once your cake is assembled, frost the top and sides with a thin layer of buttercream, smoothing it as you go. If you'd like, use a piping bag with a thin tip to pipe buttercream lines that echo the patchwork pattern on top. This is optional but creates a beautiful detail.
- Chill and serve:
- Refrigerate for at least 30 minutes before slicing. This firms everything up and makes clean, beautiful slices possible. Serve at cool room temperature, and watch faces light up when people see what's inside.
 Pin
Pin The first time I served this cake at a potluck, someone asked if I'd hired a professional baker. When I told them I'd made it myself, they didn't believe me. That disbelief turned into delight the moment they took a bite and discovered the colors inside, and suddenly I understood—this cake isn't just dessert, it's a small act of creativity made edible, a way of saying 'I care enough about you to do something beautiful and unexpected.'
Why Colored Sponge Works Better Than Food Coloring in Frosting
I learned this the hard way after trying to color frosting with food coloring, only to end up with muddy pastels and fingertips stained from handling the frosting. Coloring the batter itself means the color is baked right in—it's vibrant, it doesn't stain your hands, and you get clean, bold hues that won't fade or separate from the frosting over time. Plus, gel coloring is thick enough that it doesn't thin out your batter, which is crucial for keeping the sponge tender and moist.
Scaling This Recipe and Storage Tips
This cake actually freezes beautifully—you can bake the colored sponges days in advance, wrap them individually, and assemble when you're ready. I've made it for potlucks by baking two days ahead and assembling the morning of. The buttercream can also be made the day before and kept in an airtight container in the fridge; just bring it to room temperature and give it a quick stir before using. If you need to feed more than twelve people, the recipe doubles easily, though you'll need more baking pans or more time for batching.
The Joy of Imperfection
A real patchwork quilt is never perfectly uniform—the seams are sometimes slightly uneven, the colors fade differently with time, and those imperfections are what make it precious. This cake celebrates that same kind of handmade beauty. Your squares might be slightly different sizes, your frosting might have little ridges, and that's not just okay—it's authentic.
- If a square cracks during assembly, use it in the middle layer where it won't show, and no one will ever know
- If your colors turn out more muted than expected, that's actually charming—it looks more vintage and sophisticated
- This cake actually tastes better after sitting overnight, so there's no shame in making it a day ahead
 Pin
Pin This cake is proof that the most meaningful desserts aren't always the simplest ones—sometimes they're the ones that require intention, patience, and a willingness to create something beautiful just because you can. Make it for someone you love, or make it for yourself. Either way, you're creating a memory.
Recipe Q&A
- → How can I achieve vibrant colors without affecting the batter?
Use gel food coloring gels as they provide bright hues without thinning the batter, ensuring consistent texture and rise.
- → What is the best way to cut uniform sponge squares?
Trim edges and use a serrated knife to slice evenly sized squares, approximately 3 x 3 cm, for neat patchwork assembly.
- → How do I assemble the patchwork effect properly?
Arrange colored squares side by side using a thin layer of buttercream to glue them together, building alternating layers for a quilted look.
- → Can I add extra flavors to enhance the sponge?
Yes, incorporating citrus zest or almond extract into the batter adds subtle complexity and freshness to each bite.
- → What alternatives exist for gluten-sensitive diets?
Substitute all-purpose flour with a 1:1 gluten-free flour blend to keep the texture tender while accommodating dietary needs.
- → How long should the cake chill before serving?
Chill for at least 30 minutes to allow the buttercream to set firmly, making slicing and serving cleaner and easier.